Whenever a meal results in an excess of pork (think smoking a ham, or pork shoulder) we grind up the remnants for future delicious endeavors. While I can’t think of any good reason NOT to have your own meat grinder, at least the kitchen aid attachment kind, should you prefer to just chop the leftovers finely, this works as well. Don’t leave out the fat or thick ends… these will reduce in the pan and add flavor as well as save you from adding any oil.
I typically wake up early and start breakfast while the rest of our house is just starting to think about daylight. I make sure there’s a strong pot of coffee going and begin prep. This is the ‘me’ time part of the day, mixing up the fruits of our labor as we set out on another day of labor. It’s very ying/yang.
It’s also wonderfully paired with Mimosas 🙂
Scroll to the bottom for images while cooking.
This is a favorite weekend breakfast for us. We don't hold back on the fat or carbs, as it's meant to be fuel for a busy and active day working on the farm. Portion size is set at 2, because I typically enjoy one egg and my husband two. Adjust as you see fit. I hope this recipie becomes something you personalize into a family favorite!
IMO, the key to making this taste amazing is time. So, if you want something fast and yummy, you can prep the ingredients the night before. Soften the potatoes (using leftover dinner potatoes is a great choice), chop the onion etc. You can cook it all at once in about half the time, but I find the staging/stair-stepping approach gives the flavors time to come out. As a result, we use very little spices or external flavors.
Ingredients
- 3 Large Eggs (more if you prefer)
- 3 Dinner Potatoes (or 6-8 baby potatoes)
- 1 Medium Onion, the goal is to have 1/2 the amount of potato (more to taste)
- 2 Clobes Garlic, minced, or equal to 1/2 tsp minced
- 1 TBSP Butter
- Salt to taste/dash
- Pepper
Instructions
- Cook the potatoes until soft. As I typically do this dish in the am, I will microswave them. If you are using large potatoes, this is typically 5 min. Little potatoes cook faster, so I typically do 2 min and then fork-check for softness. Let cool.
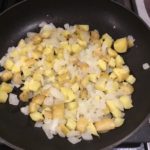
- Dice the onion. We typically go for small chunks, not slices, because i have an eater in the family who doesn't like to have crunchy onions in their breakfast foods.
- Now the potatoes have cooled down, cut them into cubes. I prefer 1/2 to 1/4 inch cubes, for crisper potatoes.
- BEGIN COOKING! Melt one TBSP butter over medium heat.
- Add the onions to the pan, keeping heat med to med low, and sauté. Add one dash of salt to assist in the carmelization process.
- Once the onions are soft, add the garlic and continue to sauté until coated w/ butter. The goal is to activate the garlic with heat, but NOT BURN.
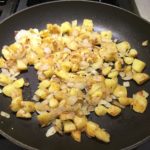
- Add the potatoes, stirring to coat. Add another 1/2 or 1 TBSP butter if needed. We don't want liquid in the bottom of the pan, as the ham will add fat also and help with the crispness of the potatoes. The goal here is just to start the potatoes to develop a layer of crisp goodness.
- Add pepper across the pan. I typically don't add salt, as the ham will bring saltiness. This is the time to add any of your other favorite seasonings. Tony's, old bay, chilli powder if you like heat.
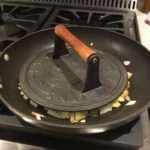
- Get out the press! Adding a press to the potatoes will get your crisp factor going, but turn often or you will burn the onions. If you use the press, don't turn up the heat. This is also a great time to start the cleanup process. I typically will wash one dish and then flip the potatoes.
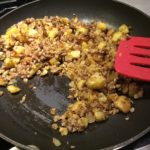
- Once you reach a light browning, it's time to add the ham. Remember, keep the heat warm enough to brown, but low enough to keep from burning the fat. The key here is a carmelization-like effect.
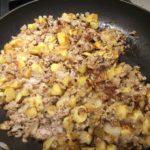
- Brown the ham (and the taters too). Keep the heat medium and flip often. This gives max crispness.
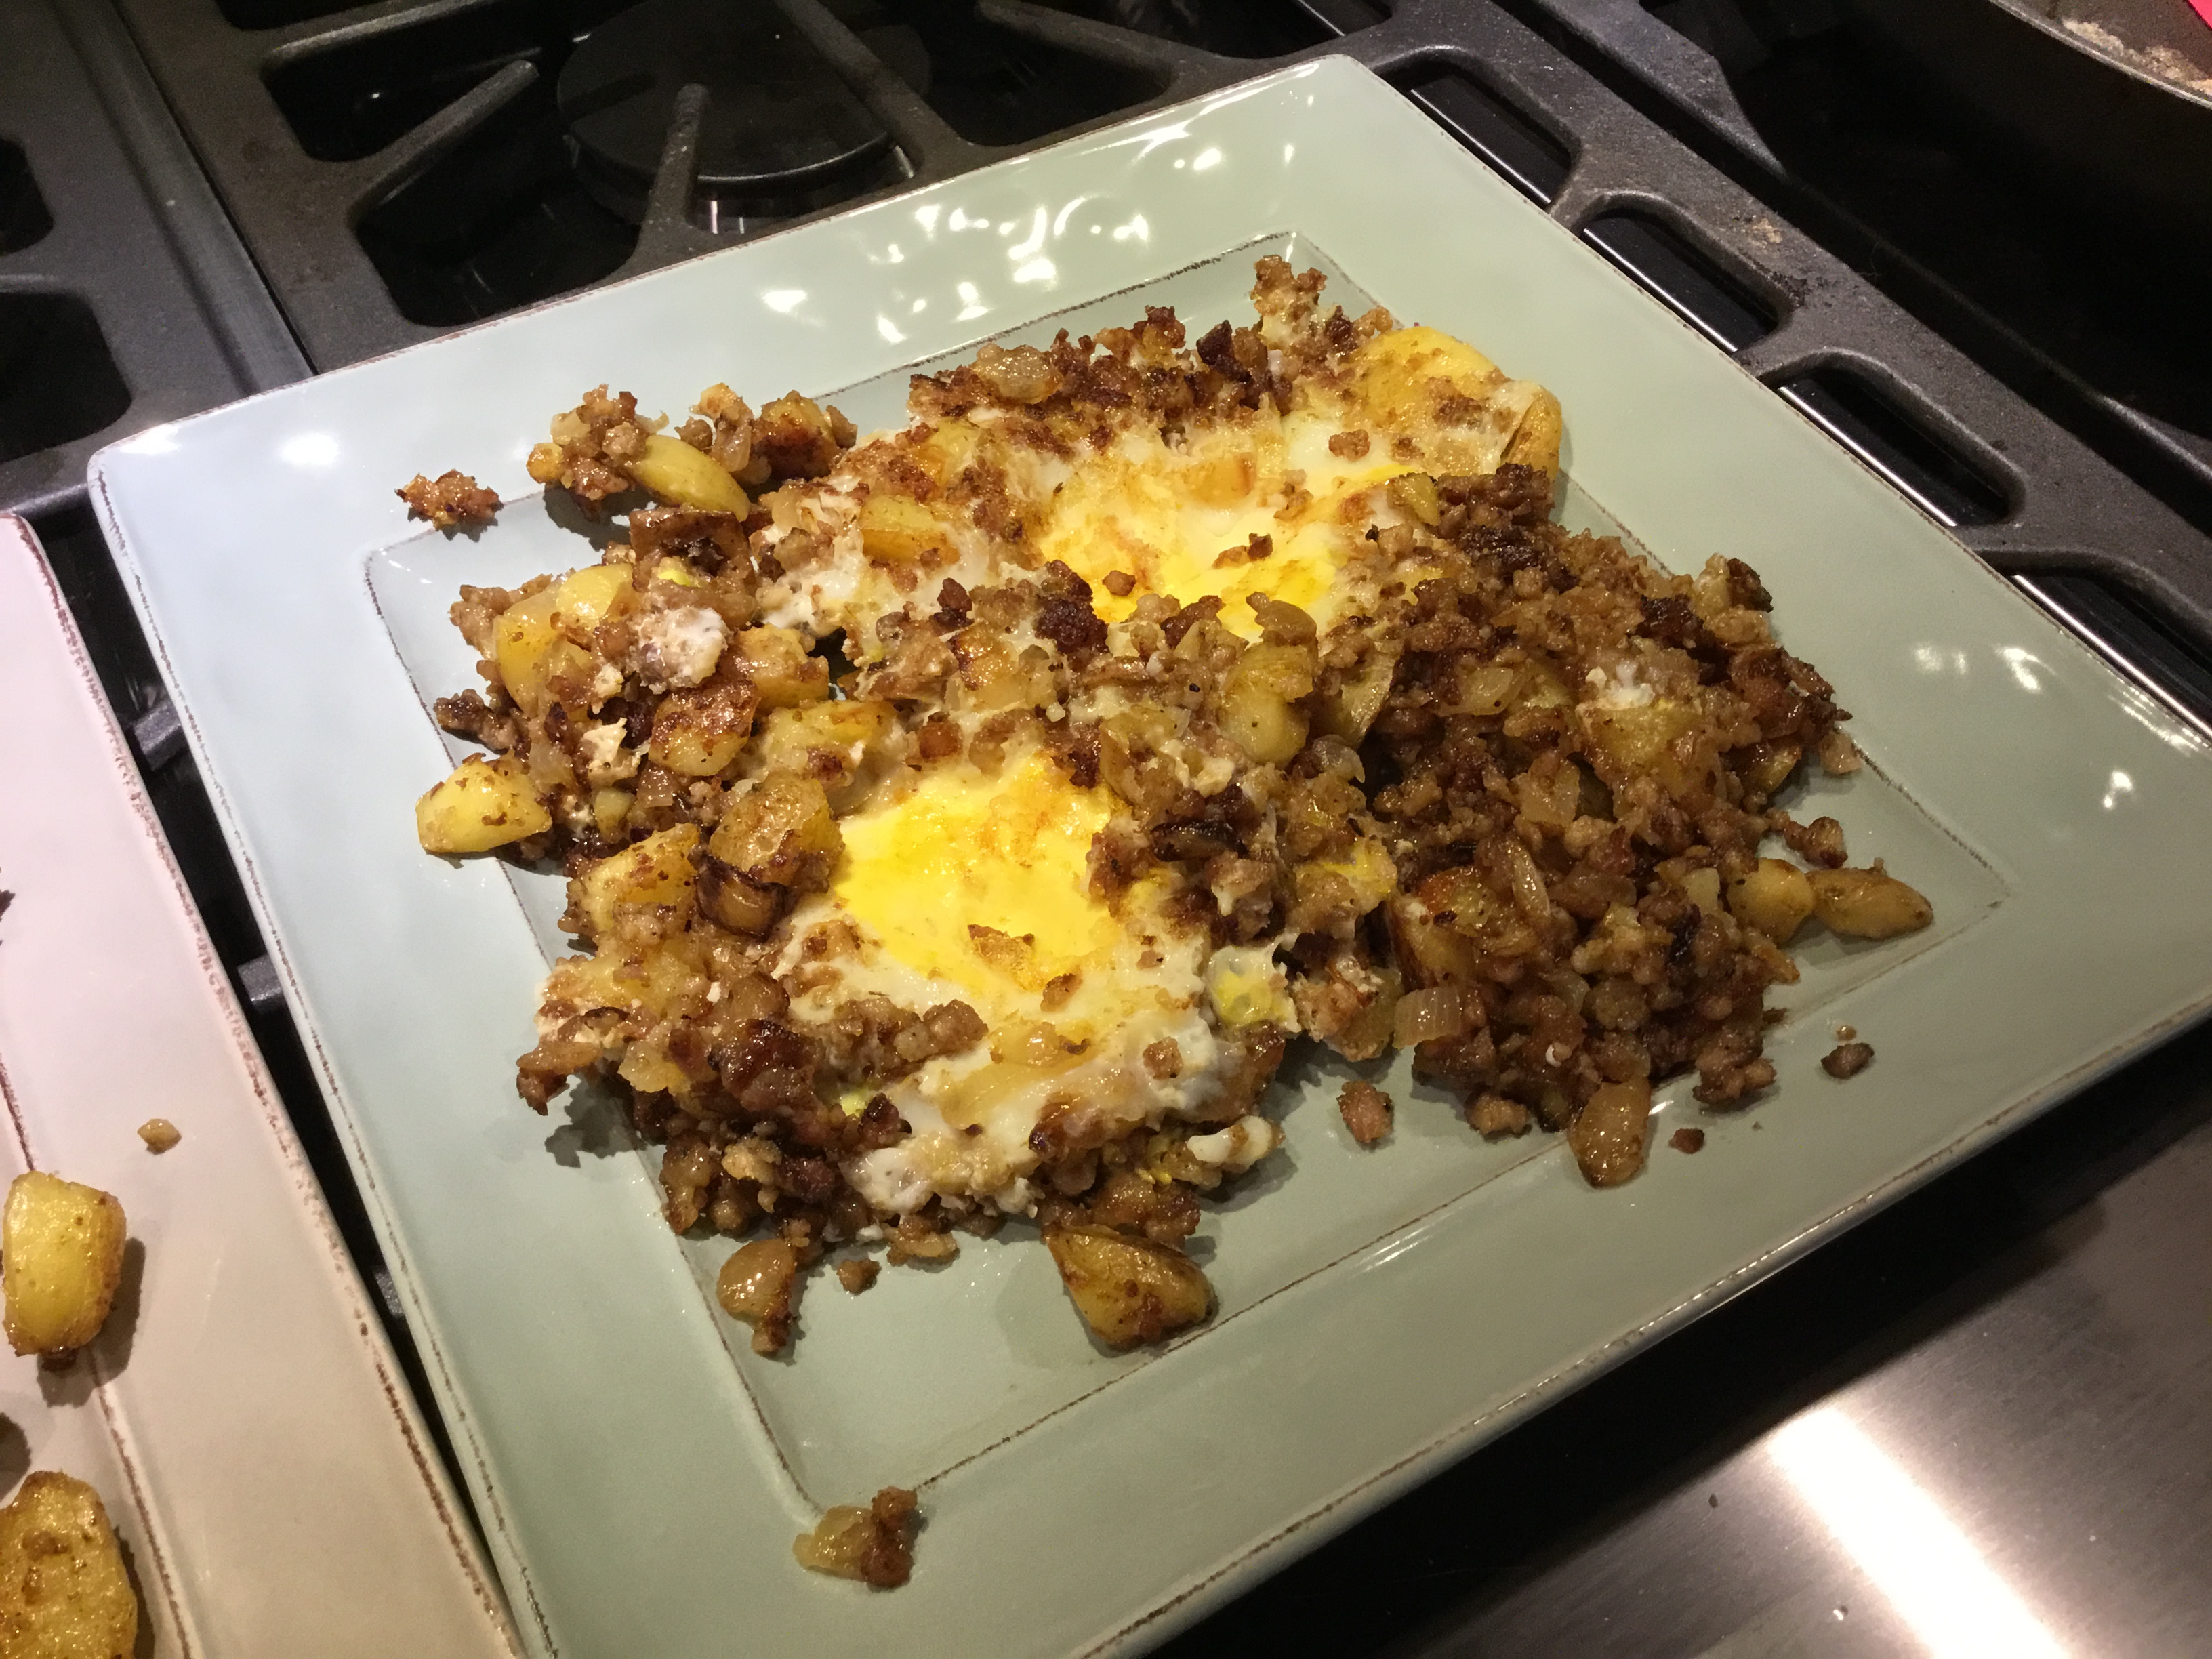
- Cook the eggs to your preference. If you are a fan of one-pan cooking (and who doesn't love to save on cleanup?) once the hash is done, make a few pits in the middle and crack your eggs directly into the hash (see pic). Just flip the whole region at the flip time and you are good to go. You can also move the hash from the middle and do a quick scramble there as well, for a more breakfasty version of fried rice.
- Serve and enjoy!